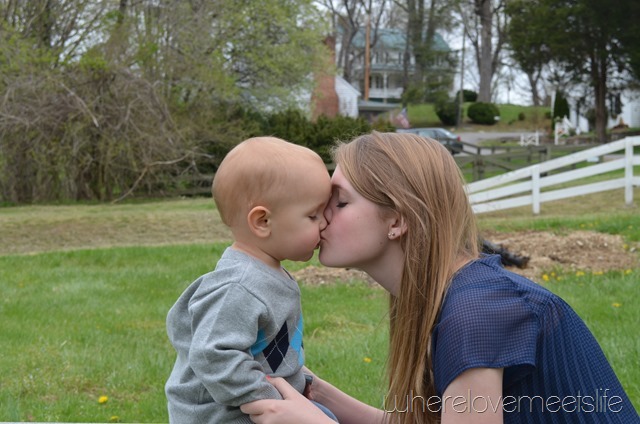
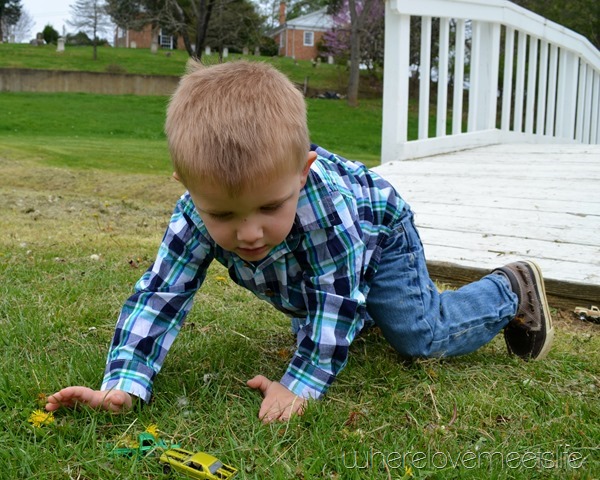
It’s Spring!! Finally.. I didn’t think winter was going to give up this year. Katie Bower issued a spring photo challenge and I thought that since we actually took some spring pictures that I would join in. We still don’t have a pic of all the kids together.. this next one is the closest I could get ![]() Crazy kids. I checked out some of the other entries so far and it’s fun to see what other people are taking pictures of. Lots of kids and May flowers! I can’t say there is much about my pics that is special than the subjects… I am learning angles and lighting. I shot these all in auto so until I learn to take some in manual mode I won’t really feel like I am advancing. I am learning my camera though and I am having fun!
Crazy kids. I checked out some of the other entries so far and it’s fun to see what other people are taking pictures of. Lots of kids and May flowers! I can’t say there is much about my pics that is special than the subjects… I am learning angles and lighting. I shot these all in auto so until I learn to take some in manual mode I won’t really feel like I am advancing. I am learning my camera though and I am having fun! 



 Head over to Bower Power and check out the rest of the photos!
Master bedroom reveal – almost 4 years in the making!
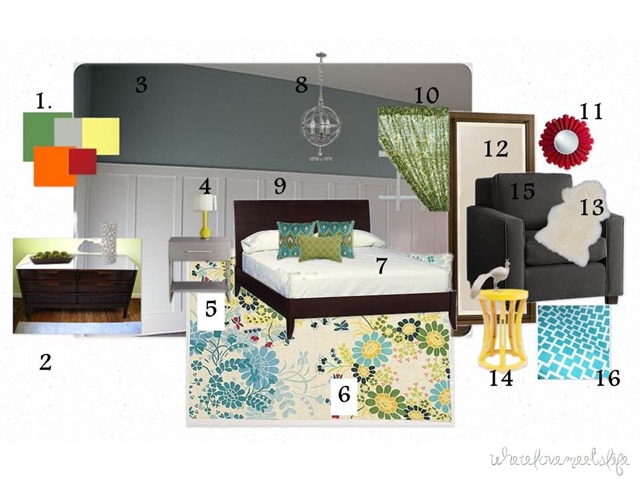
People!!!! I finally finished the master bedroom. As in 99.9% complete. Seriously, I never thought I would get done. Time is not my friend these days for completing projects, and having 2 kids under 5 is a little challenging as well. I am so happy to be at the end of this though. The fact that we are in desperate need of a bigger home has been a good push to finish this up. We are 6 people living in a 3 bedroom home. That in and of itself is really not an issue…I have no problem with kids sharing rooms. The problem is that we have a big age gap between the 2 sets of kids and the bedrooms we have are SMALL. So after all this time, here is the post where I put together my plans for the room. I think I did a fairly good job sticking to the color scheme and not changing my mind 20 times during the process. Obviously there are components that I did not complete and I am ok with that. At this point, it is sale ready and once we move into a new home I can add new items like lights and rugs. Although my mood board looks much different and I was not able to include all of the elements I had hoped, I like how things turned out.
Here is my mood board:
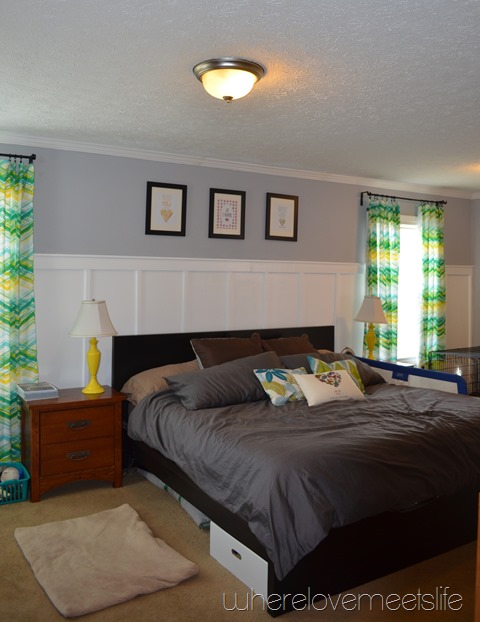
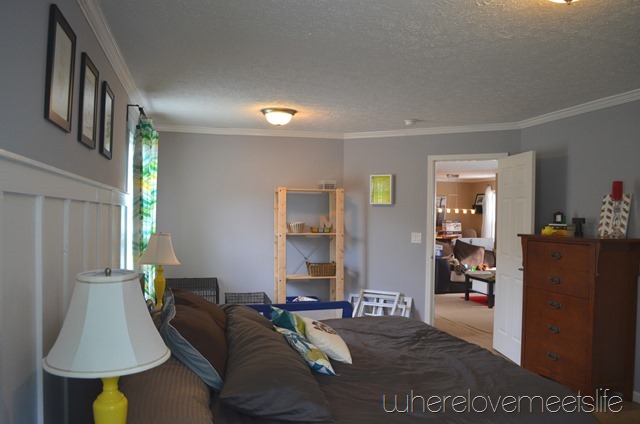
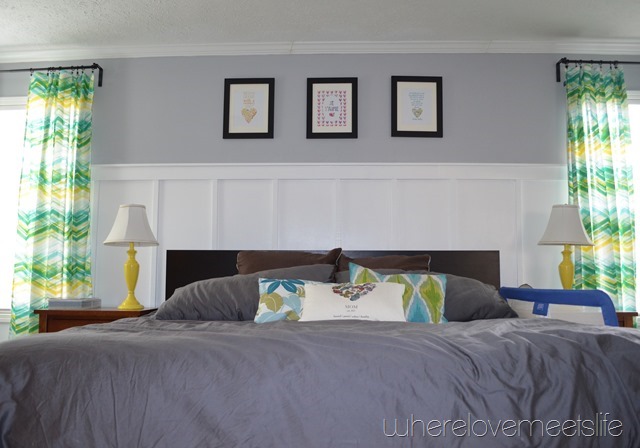
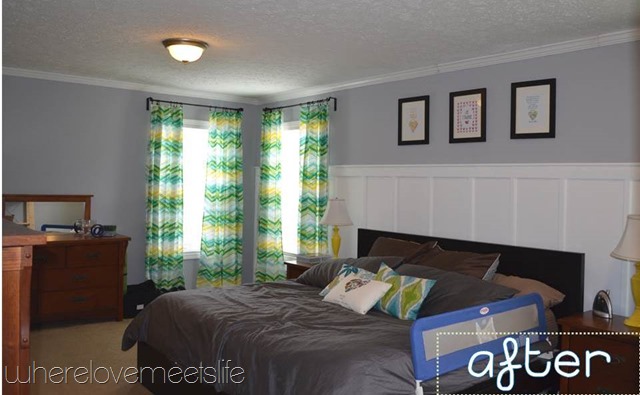
And here is the completed room!
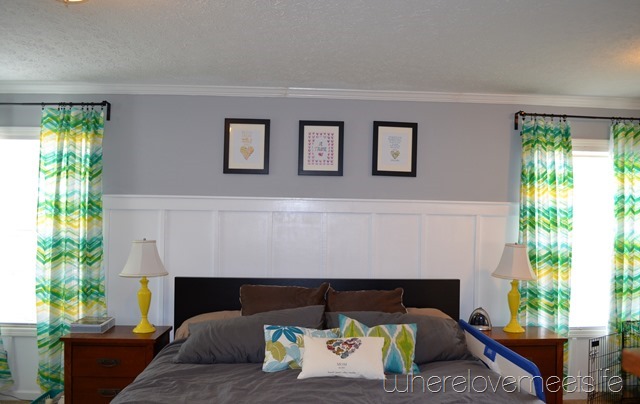
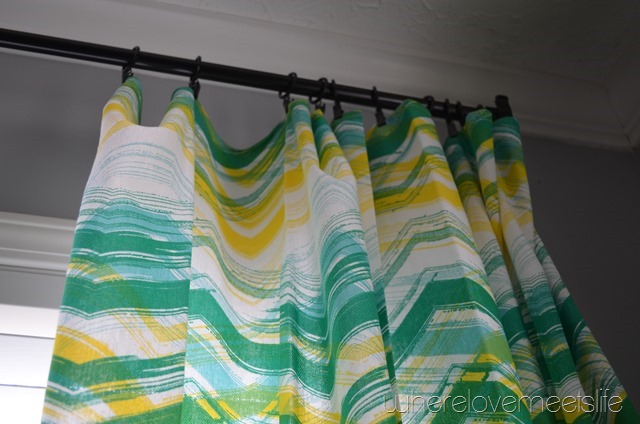
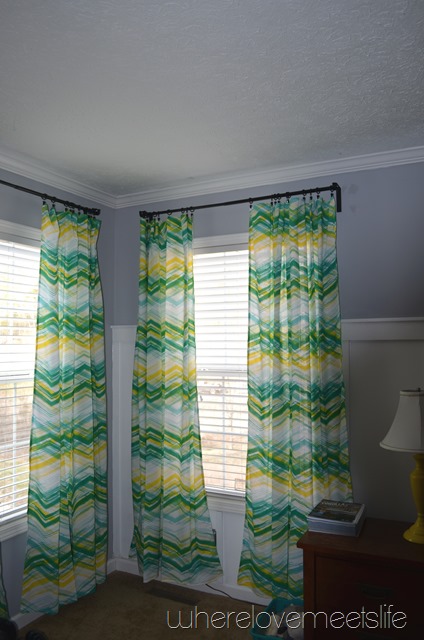
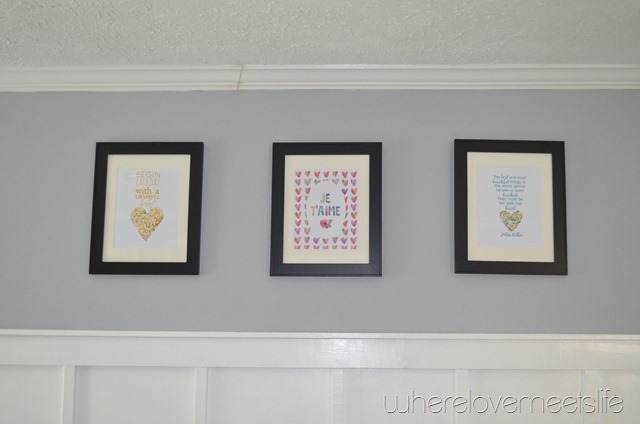
I think my favorite part is curtains and the prints above the bed. I made the curtains from clearance table cloths from Target. I should mention that I bought the curtain rods from IKEA a couple of years ago and never bothered to measure before I purchased them and they ended up being too short. Curtains should be hung high and wide – but these guys are hung with what I have. Oops!
The prints were free from On Sutton Place, the cutest prints I swear! I have been really into watercolor lately.…… Can you believe those frames are Dollar General frames for 6 bucks??? I feel like I hit the jackpot with those. They are not top quality, but you really can’t tell and they are matted. I made a placemat pillow a while back, and that made its way to the bed as well as another placemat pillow I made for the room. That cute little pillow came from RedEnvelope and you can read about how that pillow came to rest on our bed here. (You can see a complete link up at the bottom of the post on where each element came from that I have blogged about).
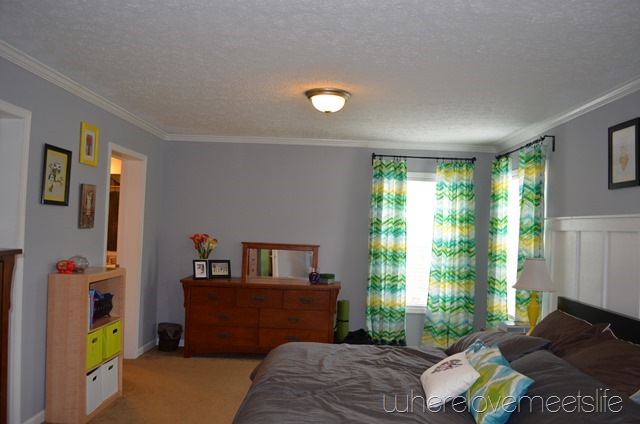
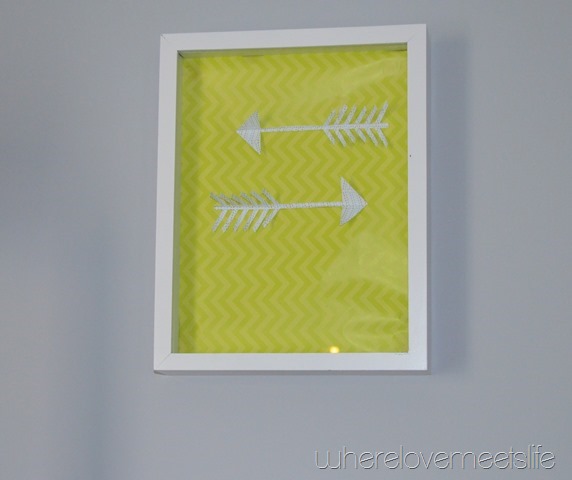
I probably should have pulled the bed rail down for pics, but honestly I didn’t have the energy to take it out and put it back. That’s just life in our home. The white picture frames on the floor were planned to be on the wall above the dog crates, but I am not sure if I will do that since have moved those shelves there. I am not sold on the shelves, but I really have nowhere else to put it. It actually gives me somewhere to keep a couple of items I have been tucking away in drawers but need easier access to (read – cloth diapers!!!!!!!!!!). That framed piece above the light switch is a shadow box that I threw some pretty paper in and some arrows cut on my Silhouette Portrait. It was difficult to get the paper smooth since there was a velvet fabric over the back piece, so I will need to replace it with fabric at some point.
The bookcase holds the dog’s sweaters in the black container, while the cubbies under that hold kids books. The bottom shelf has both little ones shoes. Ashton does a stellar job of taking his shoes off daily and putting in his cubby. The owls above that bookcase were a Goodwill find and an awesome score from the Maple festival years ago. The tree was painted by Hannah – I told her when she painted it I was framing it, lol, I don’t think she believed me.
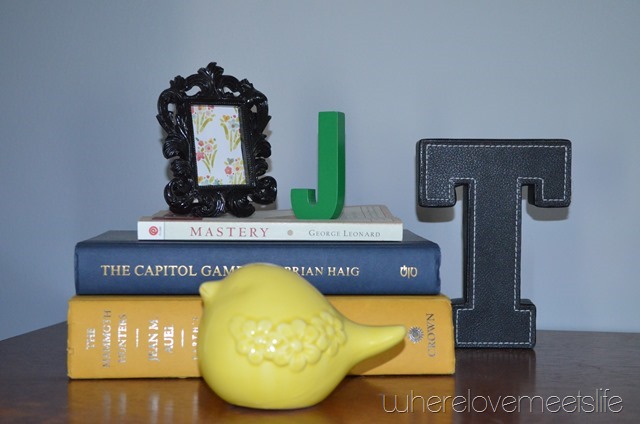
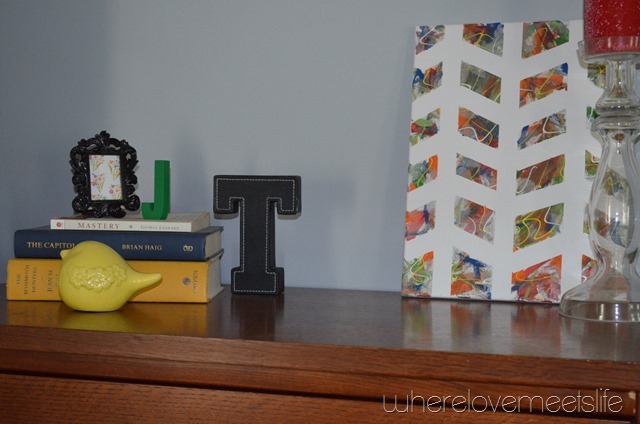
Over on the tall dresser is the DIY canvas that I made with the kids. I added some letters for Jeff and I as well as a $1 frame with pretty scrapbook paper. Believe it or not, I found that little yellow bird at Michael’s for $2!! He and his big brother (who lives in the living room) really helped me discover what colors I want to bring into my home.
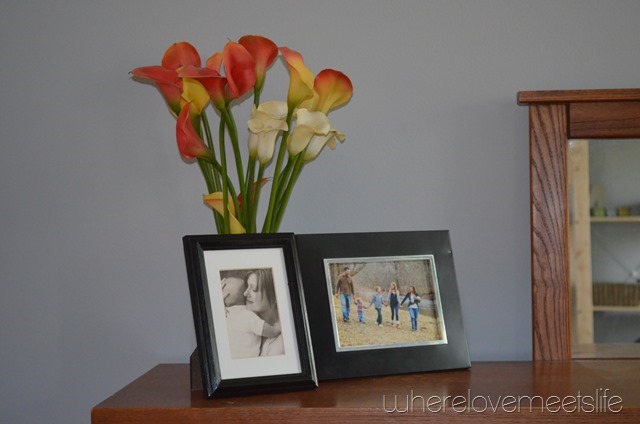
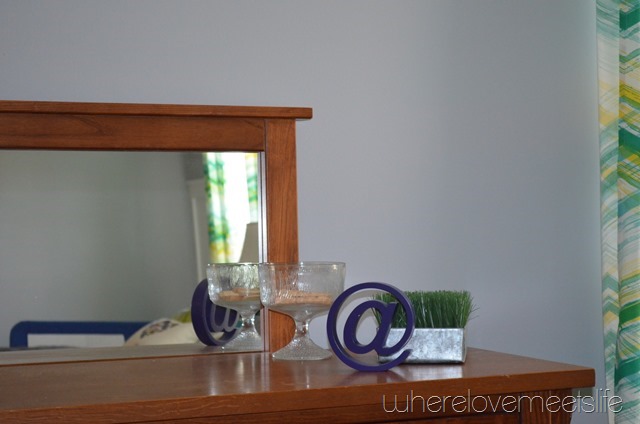
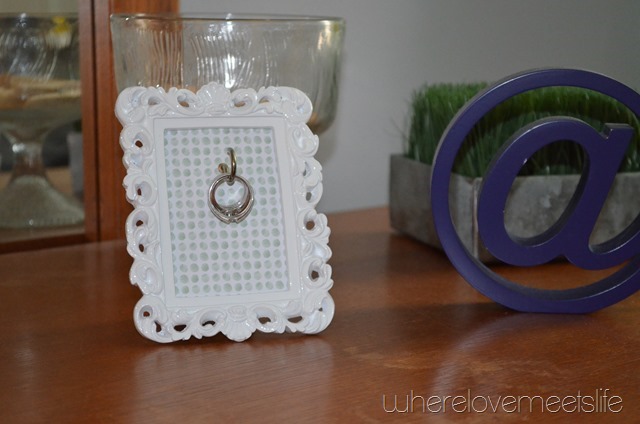
Now the long dresser in the room still needs some help since that mirror should be sitting on top of it. I have somehow lost the pieces to hang it, so I have been debating hanging it on the wall or using some scrap wood to mount it to the dresser. I am not usually a fan of the attached mirrors like this, but right now we are working with what we have. My plan had been to refinish a Craigslist find that I picked up for my birthday about 3 years ago, but that is currently sitting in storage. These pieces are my parents, and once we move I will be replacing them with items that I can make work for us a little better. I am so glad to have them right now though! I just added some pictures and odds and ends I have picked up over the years. The flowers are from my wedding bouquet. I have plans for the glass dish, but we shall see how those plans come along. I have really liked the succulent trend, and that dish would be an awesome place to make that happen. I added the ring holder last..it was a quick project from scrap book paper, a dollar frame and a tea cup hook. Now maybe I will remember to wear my wedding rings???
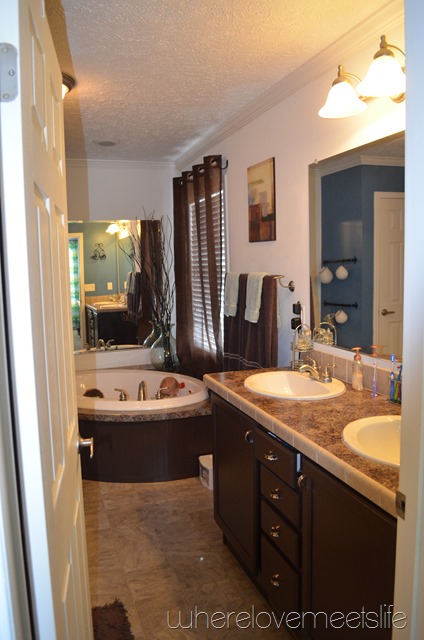
For the sake of full disclosure, the 2 doors are the closet and master bath. The closet is no frills but functional, and the master bathroom is actually a very nice room. The only issue I have with it is the color scheme. That room was completed prior to my revelation that I didn’t want to stick with browns. I couldn’t justify the expense of redoing it since it was a nicely put together room already. And the kiddos LOVE that tub – oh look…they are in there now ![]() .
.
So that wraps it up. I have to say, it has come miles, and where it stayed for so long is very frustrating, but it is such a relief to be done!
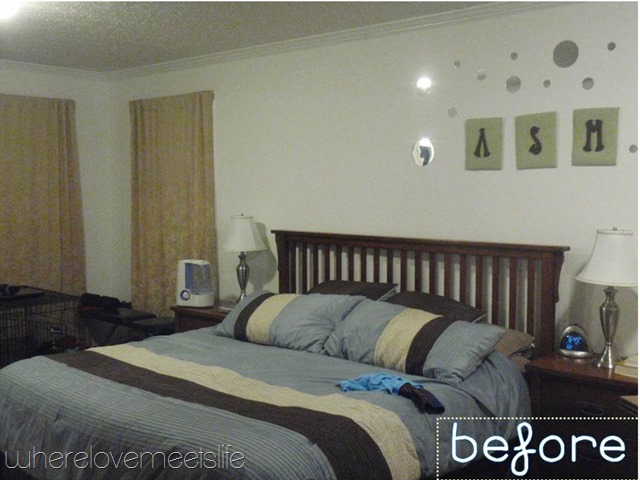
And a little before/after action:
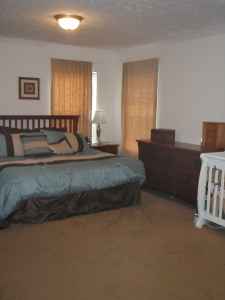
I found some more before pics and thought it would be a nice comparison. Here is a fun embarrassing photo – the first week we moved in. WOW what a mess!!!
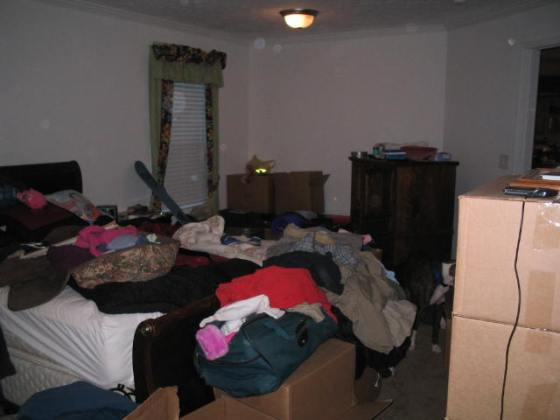 And then the arrangement prior to the above “before” photo. The crib used to reside below that ASM. 🙂 My little man’s cute setup that he never used. lol
I’m linking up with East Coast Creative on this post! Go check out their awesome site. They host an awesome blogger contest and even have a TV show! 🙂
Also check out Coming Home‘s link party – awesome stuff being shared.
A really cool email
I was perusing my email the other day… looking over the emails on blogs I subscribe to. Sometimes I check them daily, sometimes I get busy and I have to catch up. I was catching up the other day..the day I was telling you about. And to my surprise there was an email that looked a little different. I read it, 2 times, and then wondered if it was legit or if it was some kind of spam. I stewed on it for a day and then decided to forward it to an experienced blogger for some advice. Then I replied and asked some questions. Well, it turns out it was a legit email. What was it? RedEnvelope. Have you heard of them? So what came of the email?
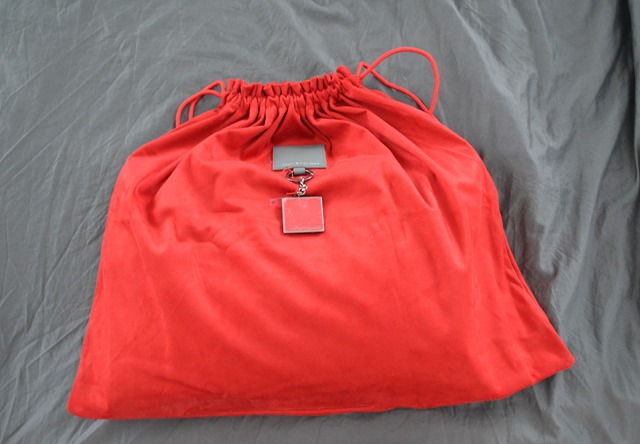
Behold!
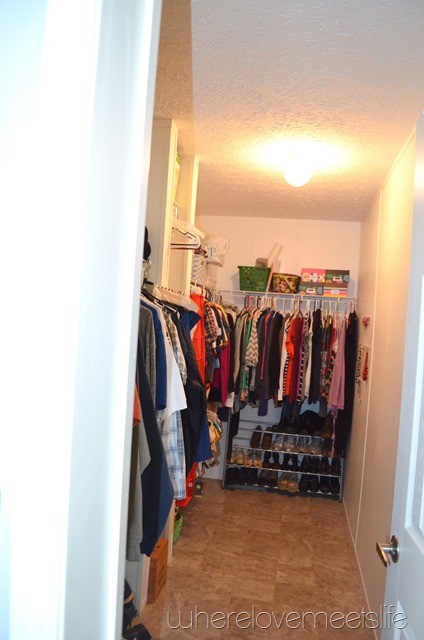
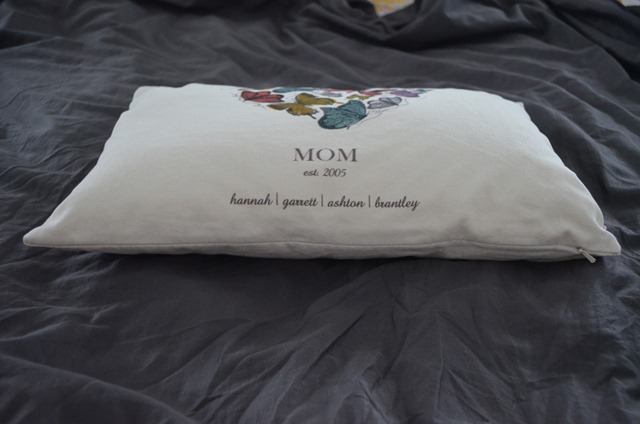
How many times do you receive a gift that comes in a red velour bag? Well this was a first for me. And inside that bag was the most adorable pillow. RedEnvelope offered me an item from their Mother’s Day line!! Should I mention how excited I am about this?? I cannot wait to have my master bedroom completed so that this pillow can take it’s place on the bed. I have been diligently working on the master bedroom. I will have an update soon and I am so ready for this room to be done. With a goal of having our house listed by April 1st, I am trying to put things in order as quickly as possible. Have I mentioned that we have a walk-in closet that hates me though? Seriously, it is large enough, but the setup is just not very functional for us, and I am not willing to put much money into it. Hopefully once I can really tackle it I will be able to come up with something that will get it looking sale ready.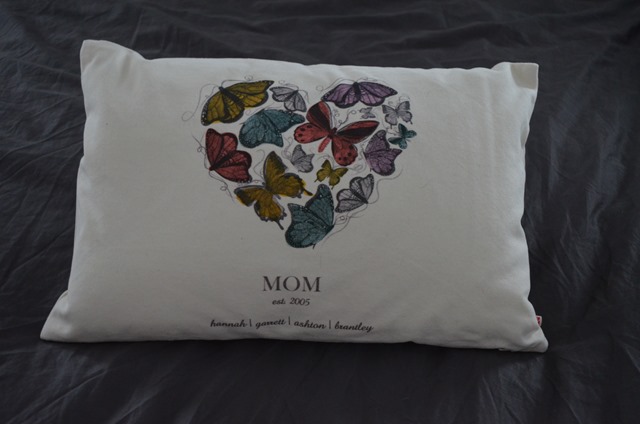
I chose to put all of the kids name on the pillow in birth order. Jeff and I became a couple in 2005… hence my est. date. ![]() The RedEnvelope mother’s day line is adorable and this little pillow is good proof. Take a few minutes and go take a look! If you really like the pillow that I chose, you can go get one yourself here. The entire experience was quite simple and the site was easy to navigate. The girl corresponding with me was so sweet and helpful. I would definitely do business with this company again.
The RedEnvelope mother’s day line is adorable and this little pillow is good proof. Take a few minutes and go take a look! If you really like the pillow that I chose, you can go get one yourself here. The entire experience was quite simple and the site was easy to navigate. The girl corresponding with me was so sweet and helpful. I would definitely do business with this company again.
Disclaimer: I was not paid for this post, Redenvelope provided me with free product, but all views are my own. There are no affiliate links in this post.
An entryway we can use
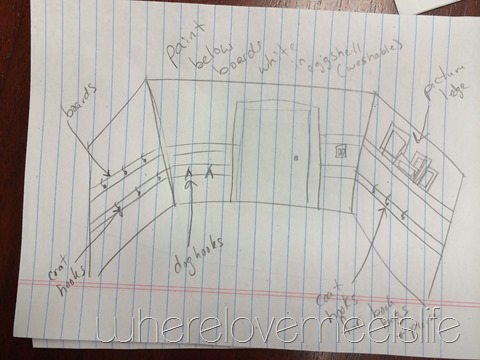
Hey strangers!! Long time no write. So I finally got the itch to blog again..or should I say enough of an itch to actually write a post rather than get a little extra sleep. I have been working on various projects around the house and I finished one this weekend that will have a pretty big impact on how we use our entryway. We have a very small entryway and for years now we have simply hung a 3 prong coat hook from Target behind the door. The only issue with that is that we were once a family of 4, now we are a family of 6! I have a 2 coat rule so that is 12 coats at any given time. I had been seeing entryways all over Pinterest with rows of hooks and pretty board and batten with matching frames and cute little benches. I knew that an elaborate entryway was out of my reach with the time I have available. The first plan I put together was a simple board and batten around the entryway with a picture ledge on top. I stewed on that for a little while, then decided that maybe a simple fix would be more in line with what I can accomplish. I put together a couple of sketches and decided on one of them to move forward with.
I measured each wall and and purchased enough 1x4x8 to do the job. Annnddd… I used a circular saw for the first time. Seriously, what took me so long?? It’s so simple. I guess that’s the typical new DIYer fear of the unknown. So I got all of the boards cut to size and enlisted my husband to get them hung for me. (note to self – invest in a good power drill). Everything was going smooth until my husband realized that the boards for behind the door were too short. Womp womp. So much for measure twice, cut once. I had forgotten that just because it says it’s a 1 inch thick board, it isn’t actually 1 inch thick. Back to the store. Of course, we don’t get to just “run to the store” where we live, I had to wait until I was back in town to get it. That night I cut it down and Jeff hung it for me. Now the fun part – patching, sanding and painting. Um, yea, not really. Have I mentioned that I have a 3 and 1 yr. old? I do all projects like this in spurts…as in when I can edge a wall, I do. Paint brushes and rollers in the fridge for a week or so is nothing new.
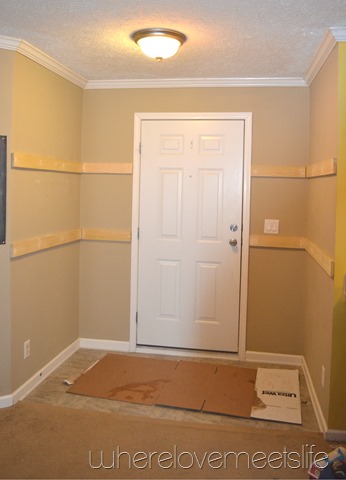
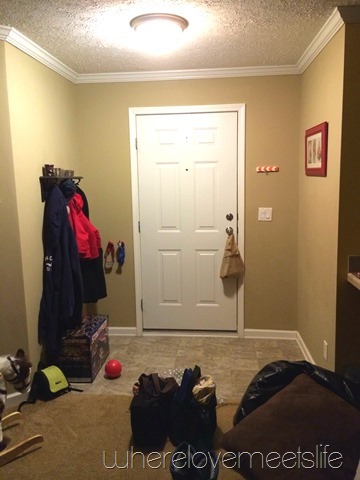
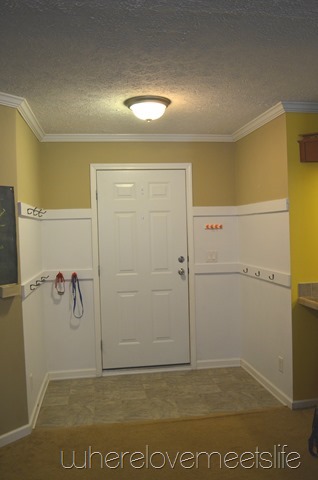
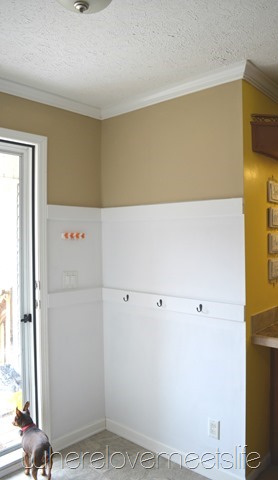
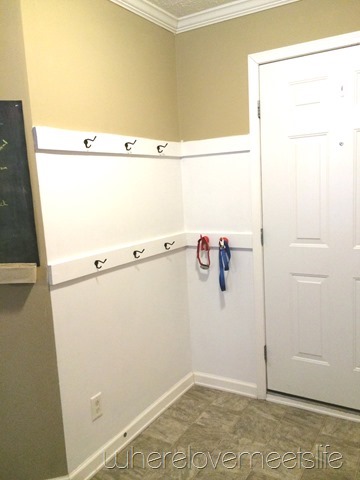
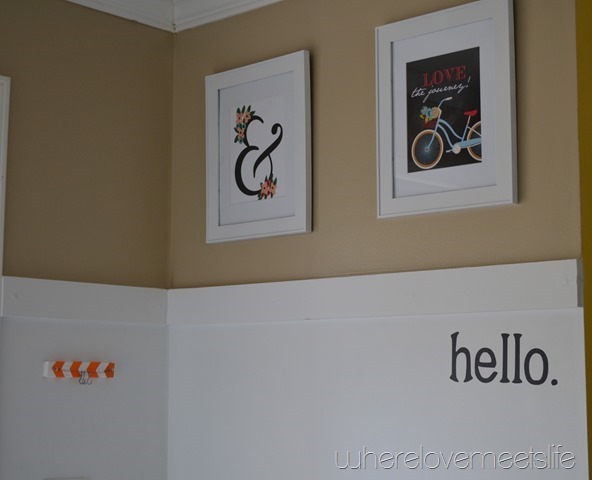
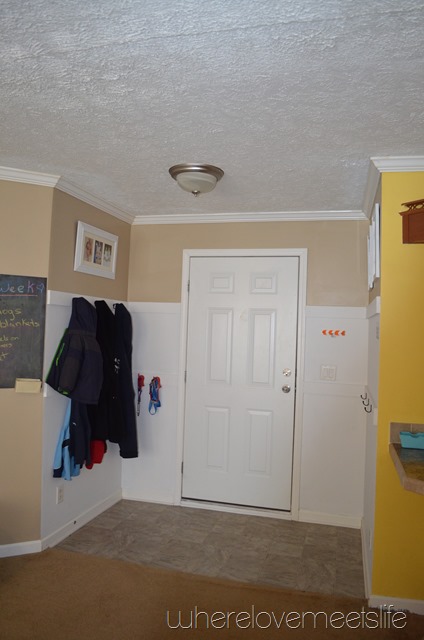
Here we are all patched up and ready to start priming. I only did one coat of primer, and 2 coats of paint. I would probably have been better served to do 2 coats of primer, but it all worked out and I think it looks good. Once it was all painted I had Jeff help me hang the coat hooks. I chose to do 6 behind the door for coats and hats and 3 in front of the door for book bags and purses. I also hung up our IKEA dog tail hooks for the dogs invisible fence collars and leash. I still need to repaint the Barley that was previously painted there as well as the adjoining wall. We have used it for almost a week and I also think we need to stagger the coat hooks…but we shall see. I want to live with it for a while first. It looks soooo much better!! Check out my before pic… our house is in perpetual chaos with little ones running around!!
This is my norm these days… bean bag and couch pillow on the floor where the kids were playing, bags to take the next day sitting in my path for the morning. Random bag hanging on the door knob so we will remember to take it back to the store.
And now….
Improved?? Yes!
So there you have it… I really HAVE been working on projects, just at a snails pace. ![]() What have you guys been up to??
What have you guys been up to??
Updates: I finally added some pictures to this and I think we can call it done!!
Merry Christmas!
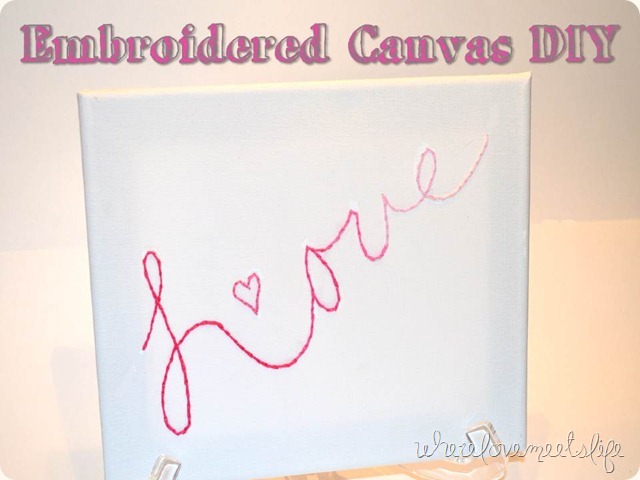
DIY Embroidered Canvas–2013 Spring Pinterest Challenge
Ladies and gentleman… I am finally posting something new! Can you believe it?? I can hardly believe I made time to write a post. Thank goodness for being able to write a post and schedule publishing it!! Anyway, on to the post.
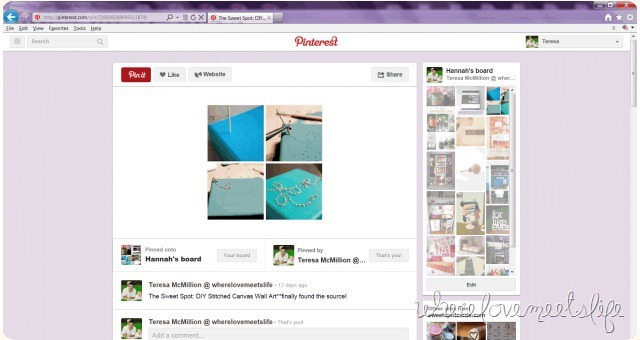
It is time for the spring edition of the younghouselove and Bower Power Pinterest challenge. I have missed the last couple of these, but not this time! I told you I had been working on things, hadn’t I? Well here is a little project that I put together for Hannah’s room. I had repined this a while back, only to realize that the pin was a dud when I went to go to the actual post it should have linked to. So I spent some time recently scouring for the original post to no avail. I decided I really wanted to make it, so I just winged it. No tutorial, just looked at the pic and went for it. Then, one day while I was doing some Google research for some more art inspiration I came across it!! Woot! There is the back story, once again, on to the post!
Here is my pin:
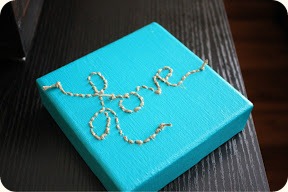
A canvas painted and embroidered. So cute, right?!
Now for my version of it. I chose to leave the canvas white (you will see why when I post about the grouping of art I did on the walls with this) and go for an ombre effect.
Ta-da!
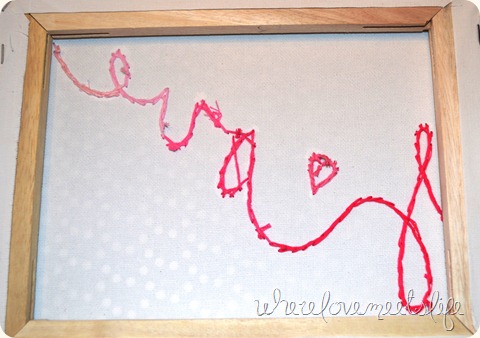
It was really simple and quick. Funny part of it is that I ended up punching holes in the canvas as well, since I couldn’t see the lines I was following from underneath the canvas. I just used the needle I was embroidering with. After reading Sandy’s post, I realized that her tute called for the same. I didn’t measure any of my stitches either, just eyed it.
I’m not going to bore you with a tutorial, Sandy offered a great one. I will explain how I did my stitching though. It was very simple. I brought the needle up through the canvas at the beginning of the L and brought it back through in the next hole. Here is where I did things a little differently – I then came back up in the next hole and brought the thread down through the end of the previous stitch. I was afraid at first that the canvas wouldn’t handle it and would rip, but that didn’t happen and I was very gentle with it.
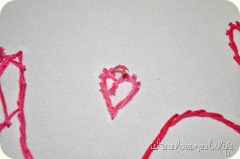
I wasn’t able to cover all of the “”template” I made with a pencil, so I attempted to cover it with some white acrylic paint. In hindsight, that wasn’t a great idea since the paint is so white and the canvas is a bit off white. I am going to try a few things to soften how white the paint is, I don’t think it will be difficult to correct.
I love how it turned out and I am dying to make another one. Maybe next time I will find a pattern to follow. Ohh… my mind is already running with this one, lol, off to write this stuff down before I forget!
If you joined in, don’t forget to link up on these awesome blogs!! And leave a comment here with a link to your project, I would love to see what you did! I am sure that I am going to spending some time checking out all the neat projects!
Pinterest challenge time again!
It’s that time people! Another Pinterest challenge has been given…and I am on board this time! Go check it out and join in the fun!
Thanks to younghouselove and Bower Power for getting us moving on those pins!
They are joining up with 2 great blogs for this challenge. Go check them out!
younghouselove
Bower Power
Red Bird Blue
Sparkle Meets Pop
Let’s meet back here next Wednesday May 8th and share what we did!
Follow my blog with Bloglovin
I will be making a few changes to the site in the next couple of weeks. Stay tuned!
Projects, projects everywhere!
I am actually, truly, seriously working on some stuff. It’s a little ADD at the moment since I don’t have any one project pulled together. I am in super organize mode so there are little spots here and there getting tweaks. Did you know we have 6 people living in a 3 bedroom house? Did I mention said house is a good bit under 2000 sq ft? We are stepping all over each other. Add in baby gear and my crafting/project hoard and you have a house that is insanely out-of-order. After I returned to work, I have not had time to put things in order. And with a complete lack of storage in this place I am having a hard time getting things to flow in our home. We have never been neat freaks, and it’s really hard to keep everyone on board with picking up after themselves. My time at home is so limited during the week. As in, I get home at 6-6:30 and it’s bed time for the kids between 8-9 and I am not too far behind them. So I squeeze in what I can for cleaning, organizing and projects on weekends and spare minutes here and there. I plan to take a day off work in the near future and put things in order – but first I need all the tools at my disposal. I have been scouring Craigslist and Goodwill trying to find the items I need (namely a dresser and some sort of cabinet or bookshelf – and maybe a table for the entry way). NO luck so far, but I know I will come across the perfect pieces.
My project list is growing, but then it has never been small and ever-changing. I come up with a “great” idea and by the time I get to it I have either decided it won’t function well in our home or adapted it a little differently. So as of now, my project list looks like this:
Complete Hannah’s room
Organize and store craft supplies
Organize our mail and general paraphernalia that gets dropped on the bars
Start on the boy’s room
Redo guest bath
Finish master bedroom
I haven’t decided how I will post on Hannah’s room. I will either give you tutorials along the way as I complete them, or churn those out after the reveal. We shall see what time allows me. I have her room started…just getting into it deeper now. The to do list in there is not too bad.
1. New curtains
2. Paint the walls
3. Hang her chandelier
4. hang a TV on the wall
5. New bed
6. Get and makeover a dresser
7. Address storage in her room
8. Possibly a desk
9. Art for all walls
10. Bedding and pillows
11. Closet organization
I have paint for the guest bath and have already primed over the color that was in there. I have ideas and pinned some things for in there. It’s basically needing to be made more grown up and less polka-dotted. I have lots of organizing tools and plans, just need to execute those in the main living areas. I have also decided to rethink how we use our kitchen and bathroom cabinets. So much wasted space!! The boy’s room is the least planned out right now, but I feel like it will come together really easily once I get started.
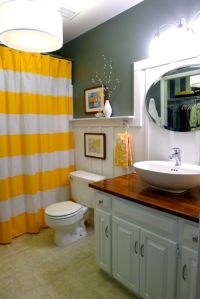
And of course I can’t have a post without a pic of some sort.. so here is some inspiration I have for the guest bath and organizing.
Awesome bath found HERE
Go and check out the rest of Meredith’s handy work. She just revealed their guest bath remodel. Wow, it looks amazing.
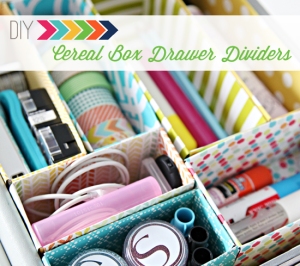
Awesome organizing found HERE
If you haven’t checked out iHeart Organizing, I strongly recommend it. This woman makes organizing look fun, and pretty!! Her site is so motivational.
So I am just going to keep on keeping on. Hopefully that will include some fun blog posts as well!
2013 Resolutions
Or something like that. I tend to avoid resolutions. I feel that if you have a goal, start it when you decide it’s a goal, and it doesn’t need to wait till the new year. But with that said, it’s nice to put together a combined list of goals you want to work towards. This year, I have decided that I am going to put some goals together so I can actually track some progress. And hey, just for fun – have a family resolution for the year!
#1 The easiest goal for me this year is health and fitness. We have been a health-minded family for a long time, and with the birth of a baby and a busy schedule, we have to find time to eat well and exercise. Winter makes it a little harder on the exercise front, but it shouldnt’ be an excuse to not do anything at all. So it’s time to get back on board with being healthy.
#2 A little different goal for me is to get to a comfortable place with going green. I am having a hard time finding a place where I feel like we are being green, but not forgoing all the things in life that make me happy (or just make life much easier). I love make-up, hair products and food. I have been trying to find products that are organic and as few chemicals as possible. Let’s face it though, I need some products in my life that make me feel good about me. So how much of that can I allow without feeling like I am loading my body up with chemicals? I am not sure..but I intend to find out this year.
#3 A common goal this year – put my house in order!!! Organize, clean and make keeping it clean a little easier. Although decor is my love, at this point I think just getting things put away and clean is going to be a challenge. I must put some time, money and effort into making that job al little easier on all of us in the house.
#4 Make more meaningful time with friends and family. Not only do we have 4 kids in the house, but we both work full-time jobs outside of the home. Time is something we don’t have a lot of. I want to have more memories of family time with the kids and my husband. We also have local family that deserves more of our time than they get. Oh and friends? Well…let’s just say that if you aren’t family living in our home, you don’t really get my time. That’s a little bit of a problem if I want to have a life outside my kids to feel like “me”. I need female time to keep from getting lost in mommyhood and losing myself. I need to be able to have conversations that don’t always include breastfeeding, cloth diapers or sleeping habits. Don’t get me wrong, I am very passionate about those topics, especially breastfeeding, but there IS more to life.
And that family resolution I mentioned? We have decided that we will all perform at least one random act of kindness each month for the year. Each month we will sit down and talk about what we did. It always feels good to help someone out for no other reason than we can, and there is a need. I would love to see the kids be more attentive to other’s needs, and it can’t hurt myself or my husband either.
So that’s it… I am ready for this year. Are you? What are your resolutions or goals??

